Explanation
This project was actually two separate phases used to build the My Mood Mix app using first plain JavaScript, then refactoring it using jQuery. The purpose of executing it twice in separate ways was to establish the foundations of each one, and to find out their differences when trying to execute the functionality. My role was to build the app each time for the typical user wanting to play and listen to music by streaming it.
Problem
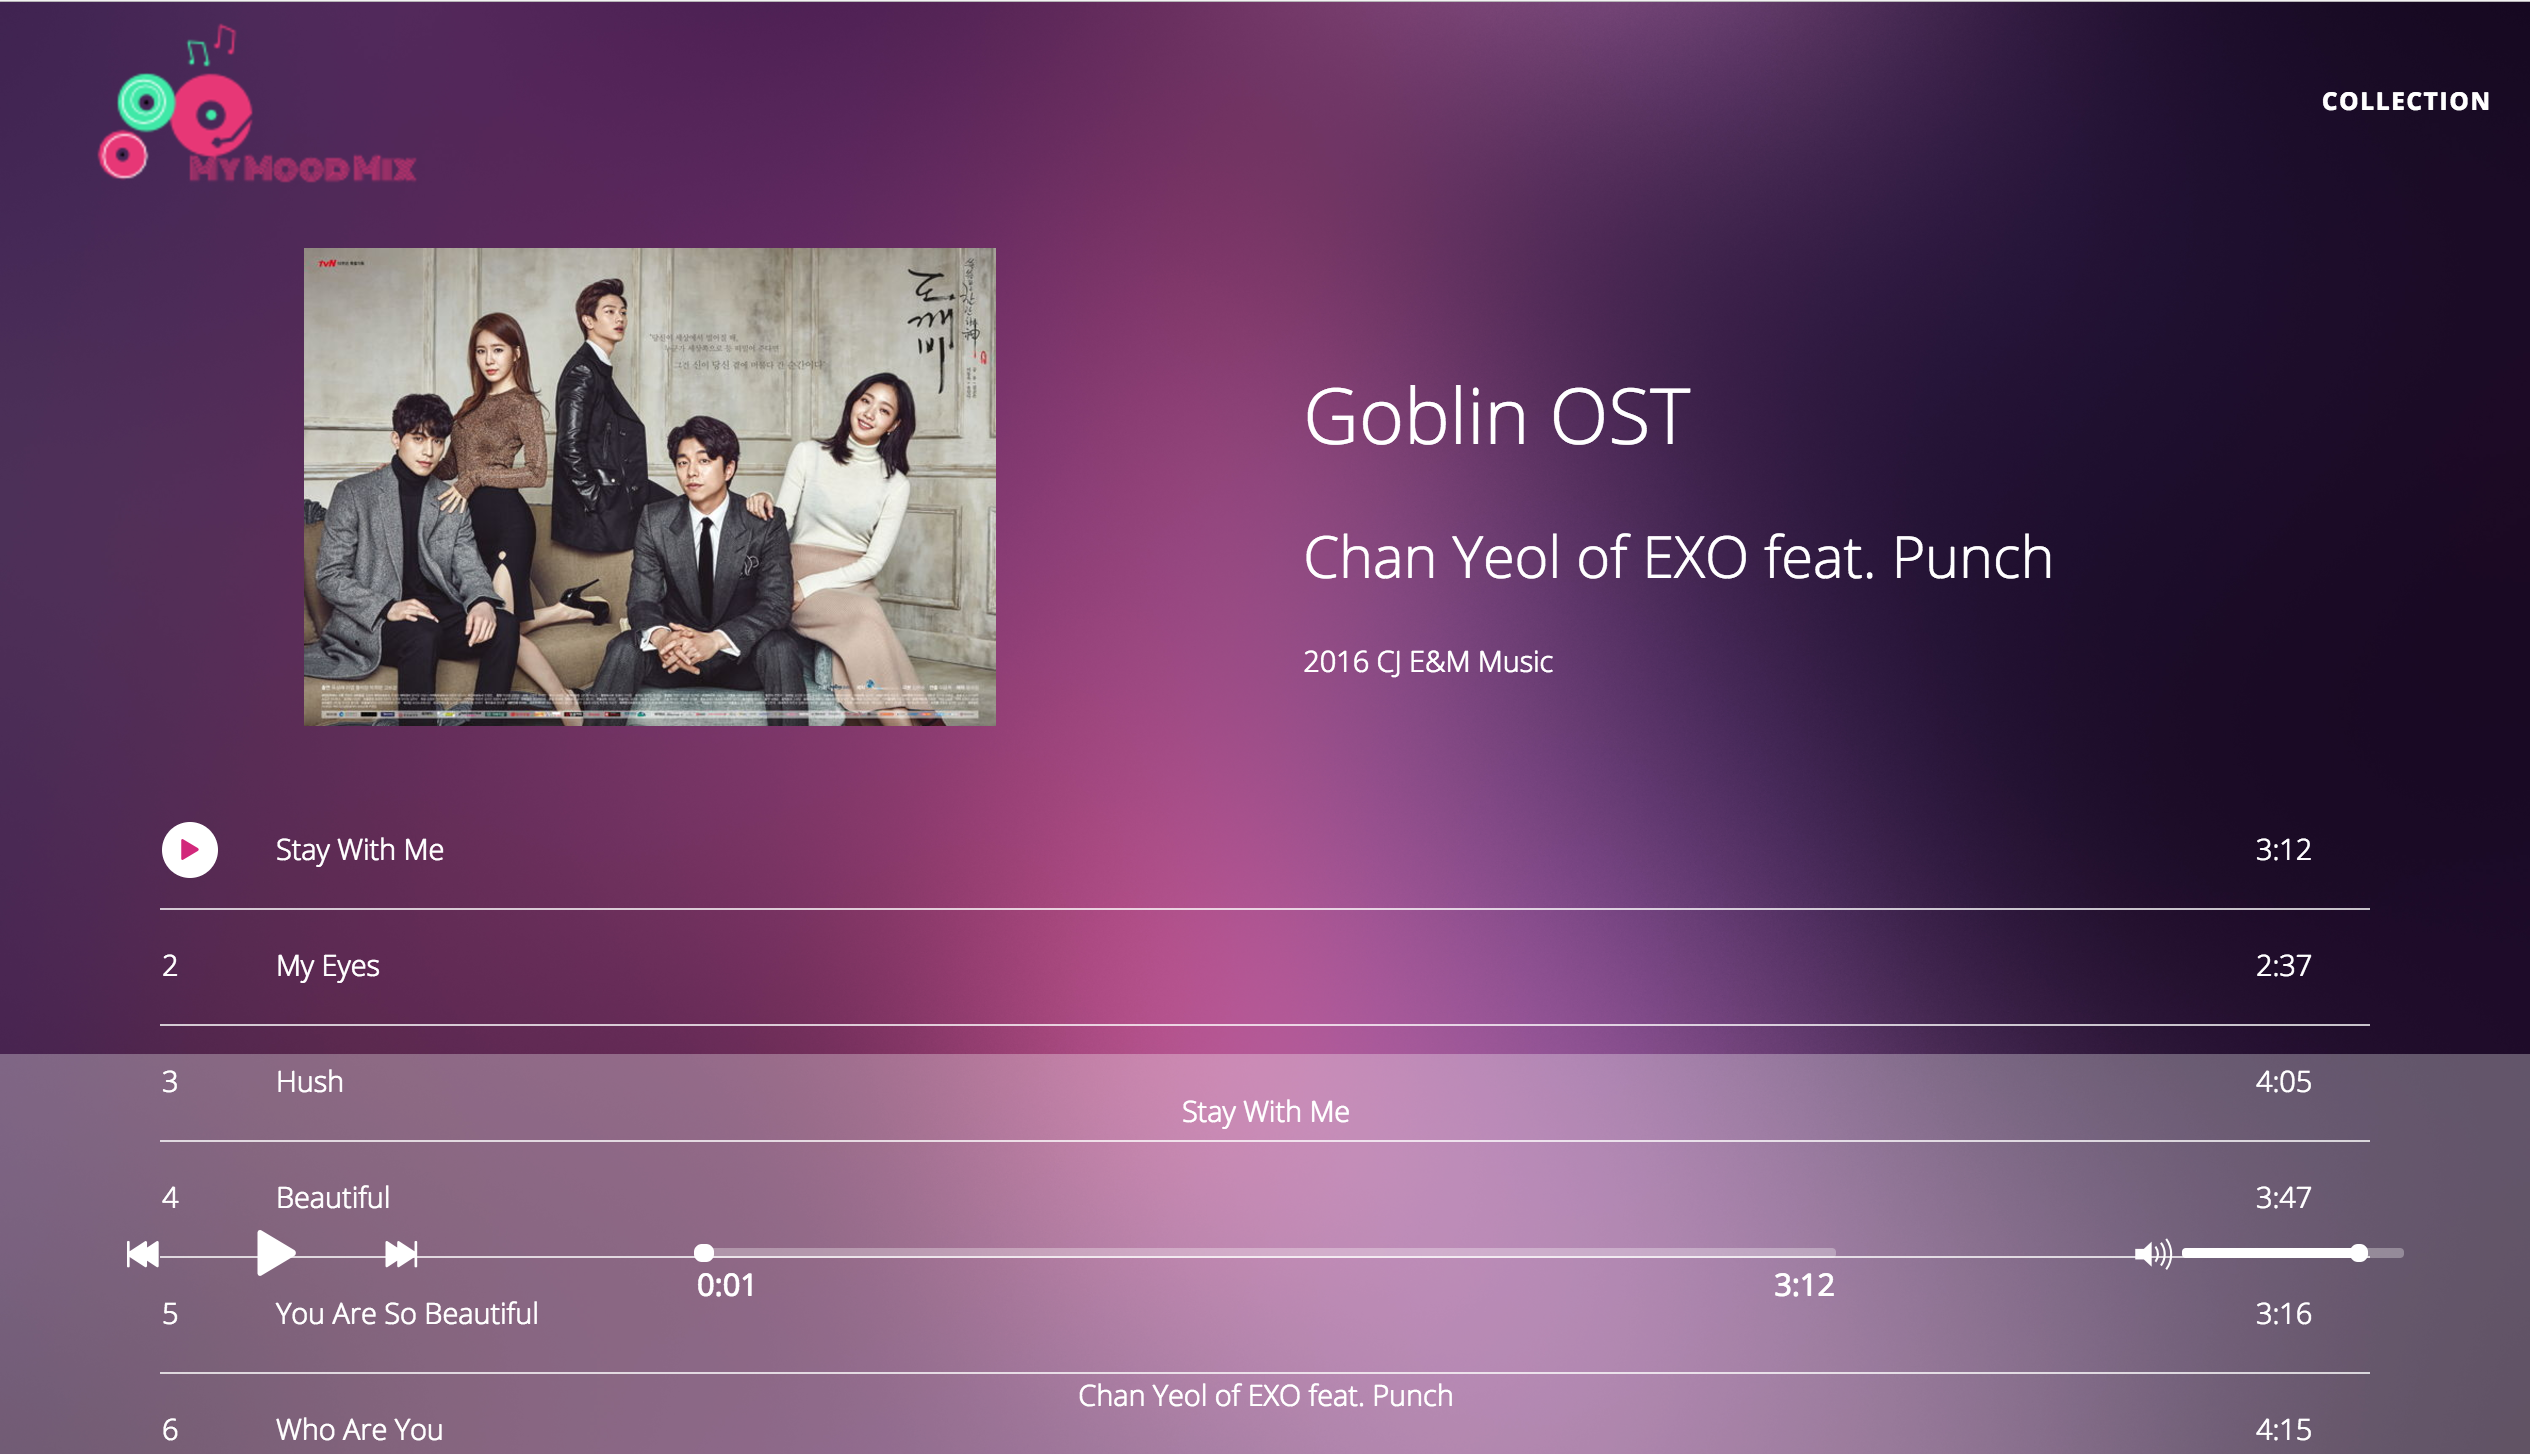
Since this was not a preexisting application, each component had to be built out from the ground up. This included a home landing page to welcome new users, a second page where the user could view his/her collection, and finally an album view once a album had been selected. Here the user needed to be able to have all the typical playback abilities in a music player (i.e. play/pause, skip tracks forward/backward, skip within a song, and adjust volume). Another requirement was for the app to be responsive when the browser size is adjusted or if viewed on a mobile device.
Solution
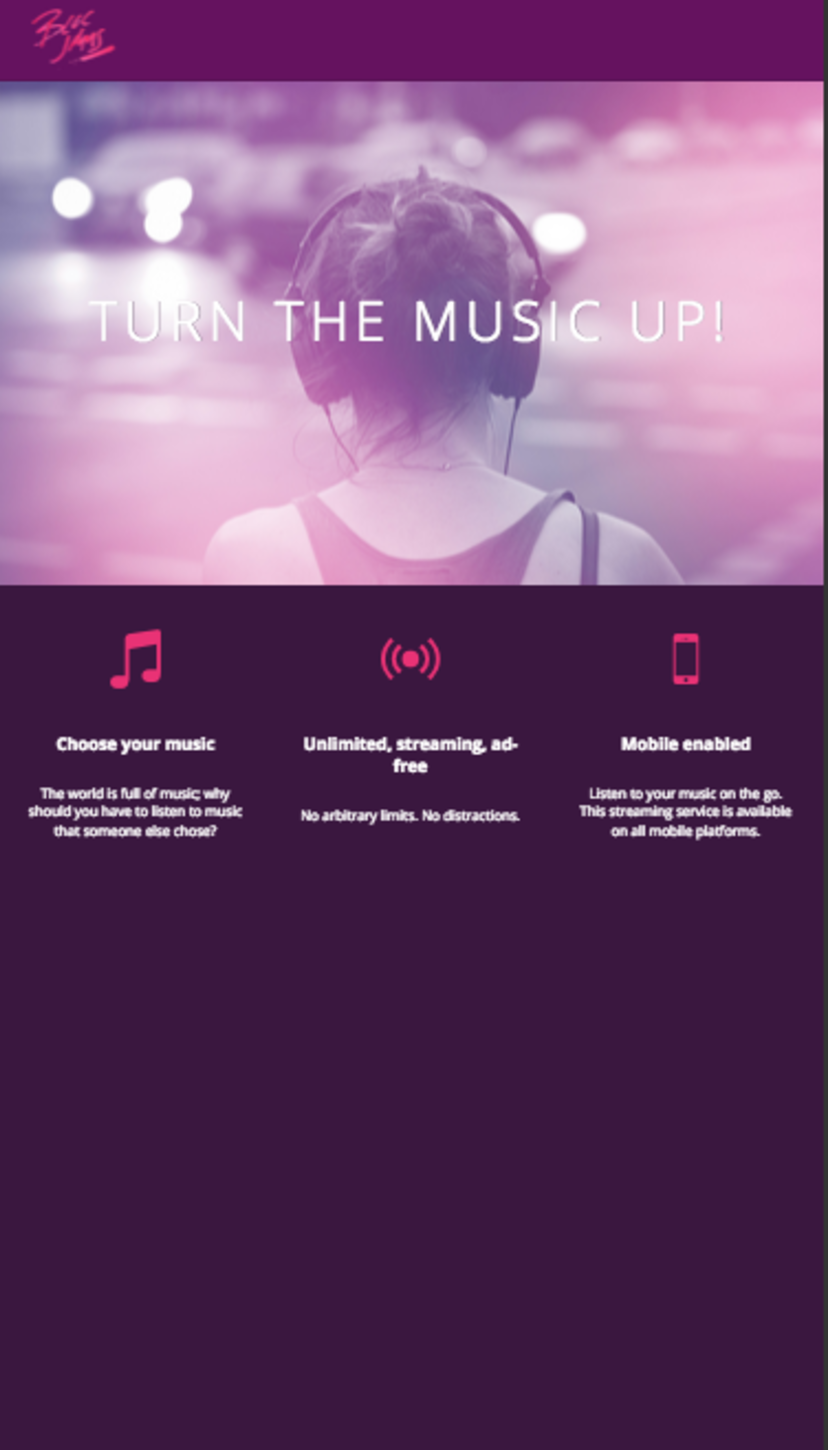
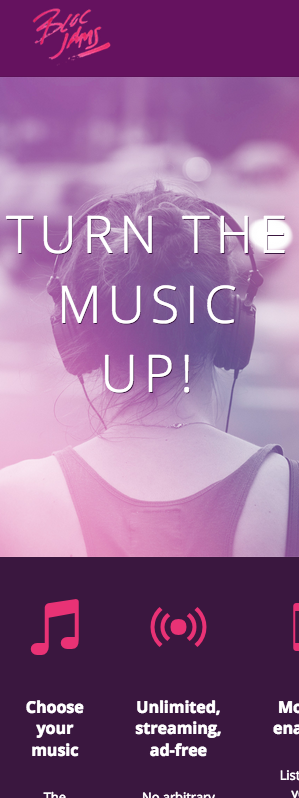
To help make the app responsive, the viewport meta tag was added to the HTML to indicate how the browser should render the content in a device’s viewport which is a virtual window such as the browser window. See on the left the way the app looks on a mobile device without the viewport tag and the image on the right which does have it.
To set up the layout of the page, instead of using something such as Bootstrap’s grid systems, I built my own.

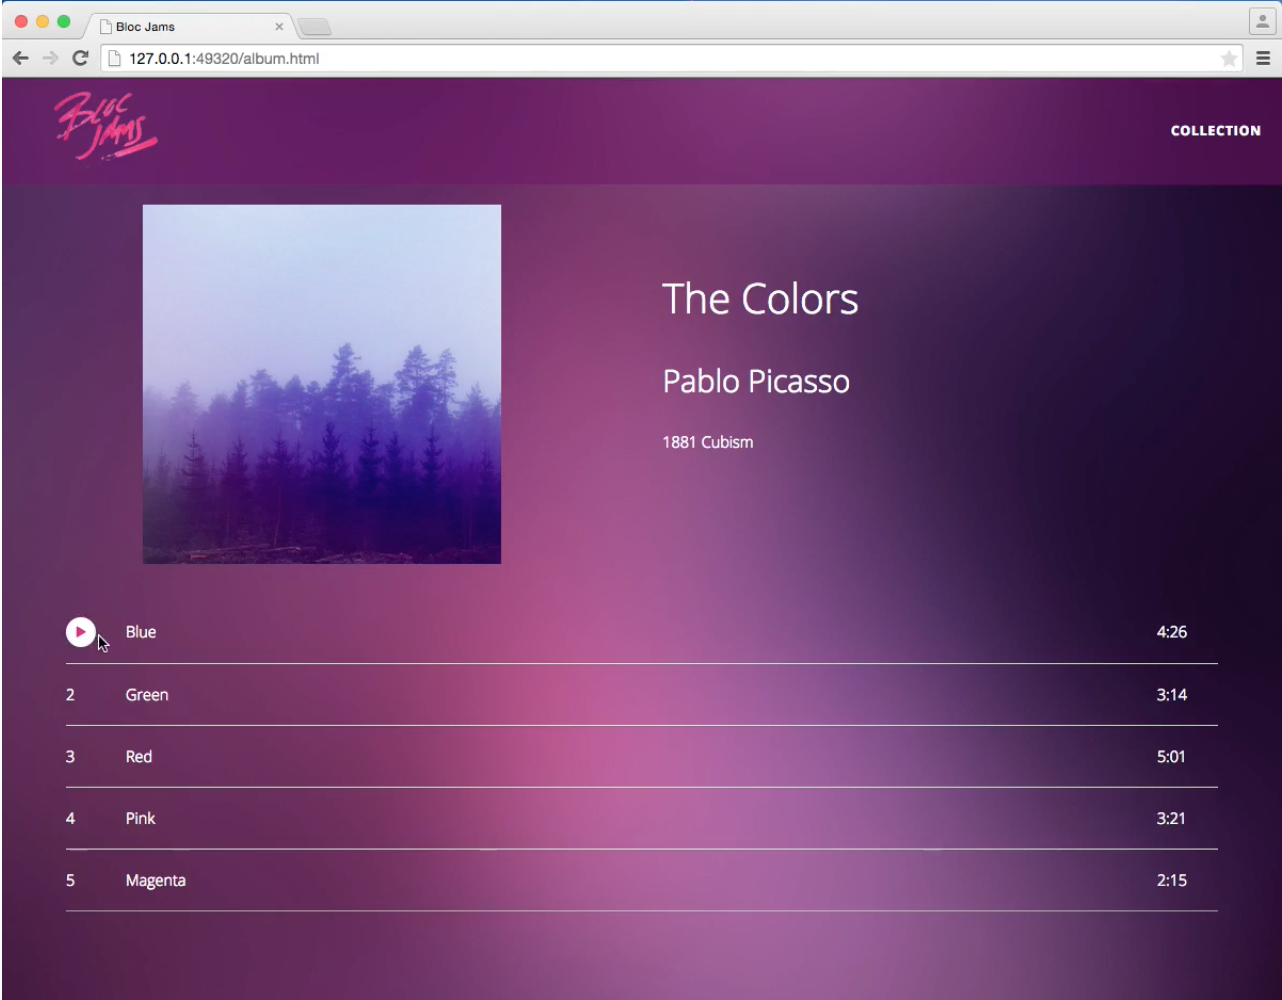
The home page and the collection page were rather simple but the album view was another story. This is where all the major functionality would be for the app. When setting up the HTML and CSS for the page one of the major parts involved setting up a table template where all the data and the album would be laid out.
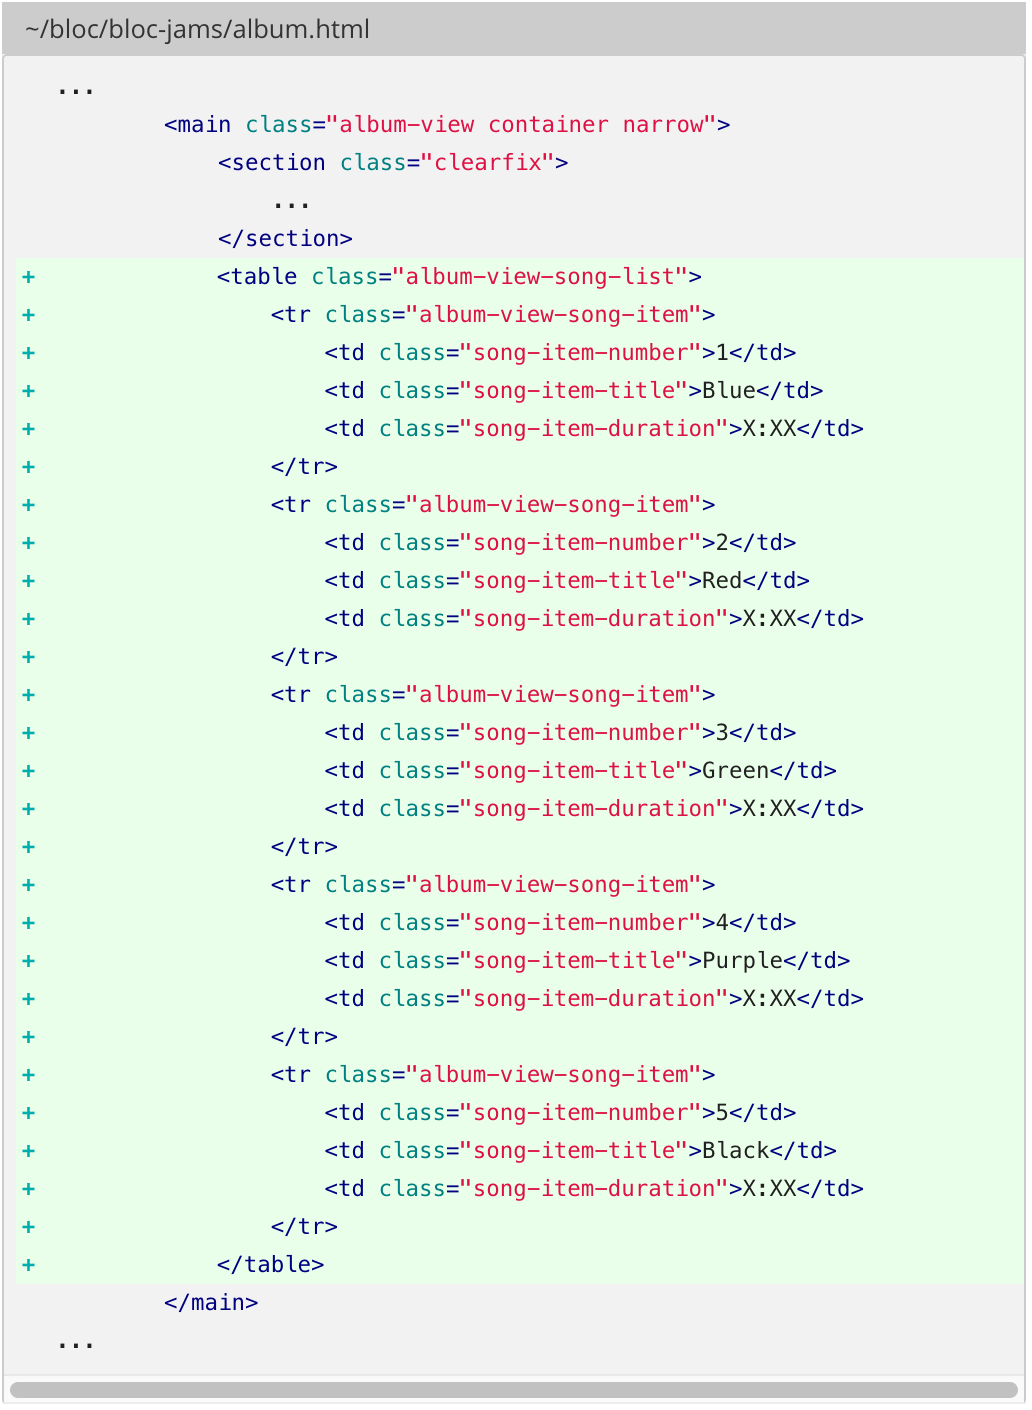
While this was visually helpful, it was clear that this would be painfully repetitive the more songs were in an album and as more albums would be added. Instead of using a static template such as this one, I opted to create a dynamic template where the rows of the table could be automatically populated as needed with the data from the album.
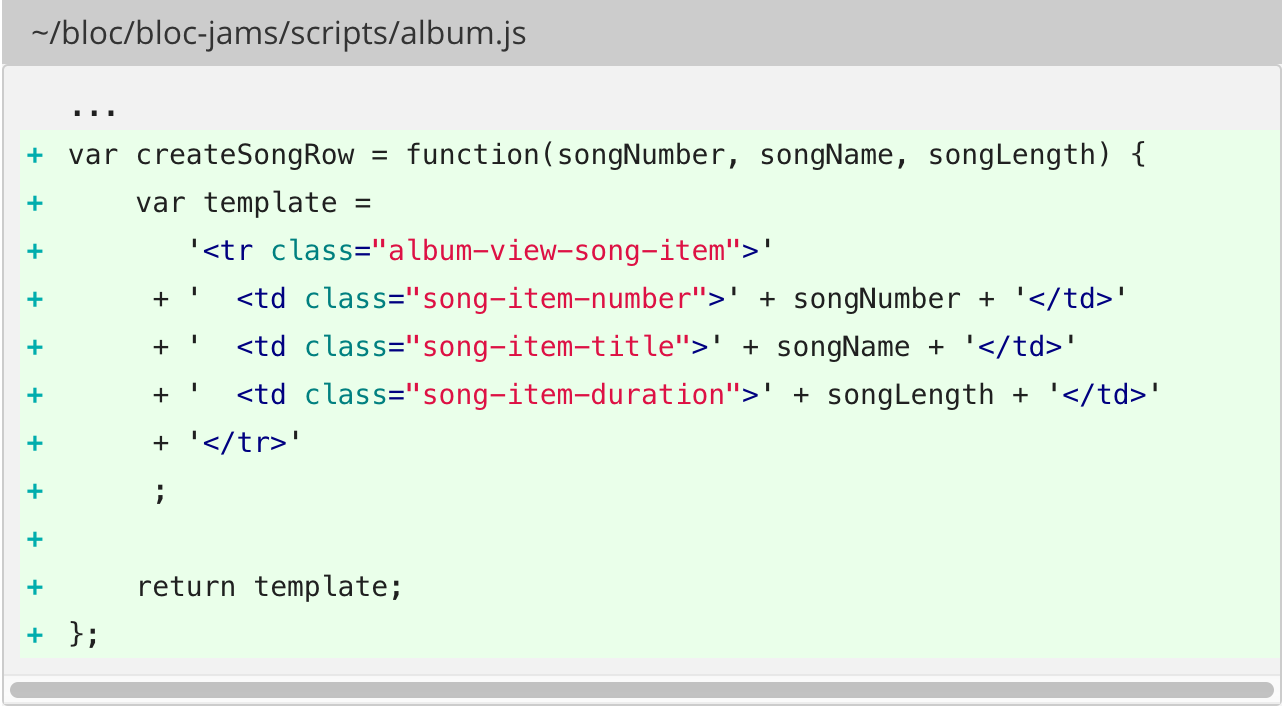
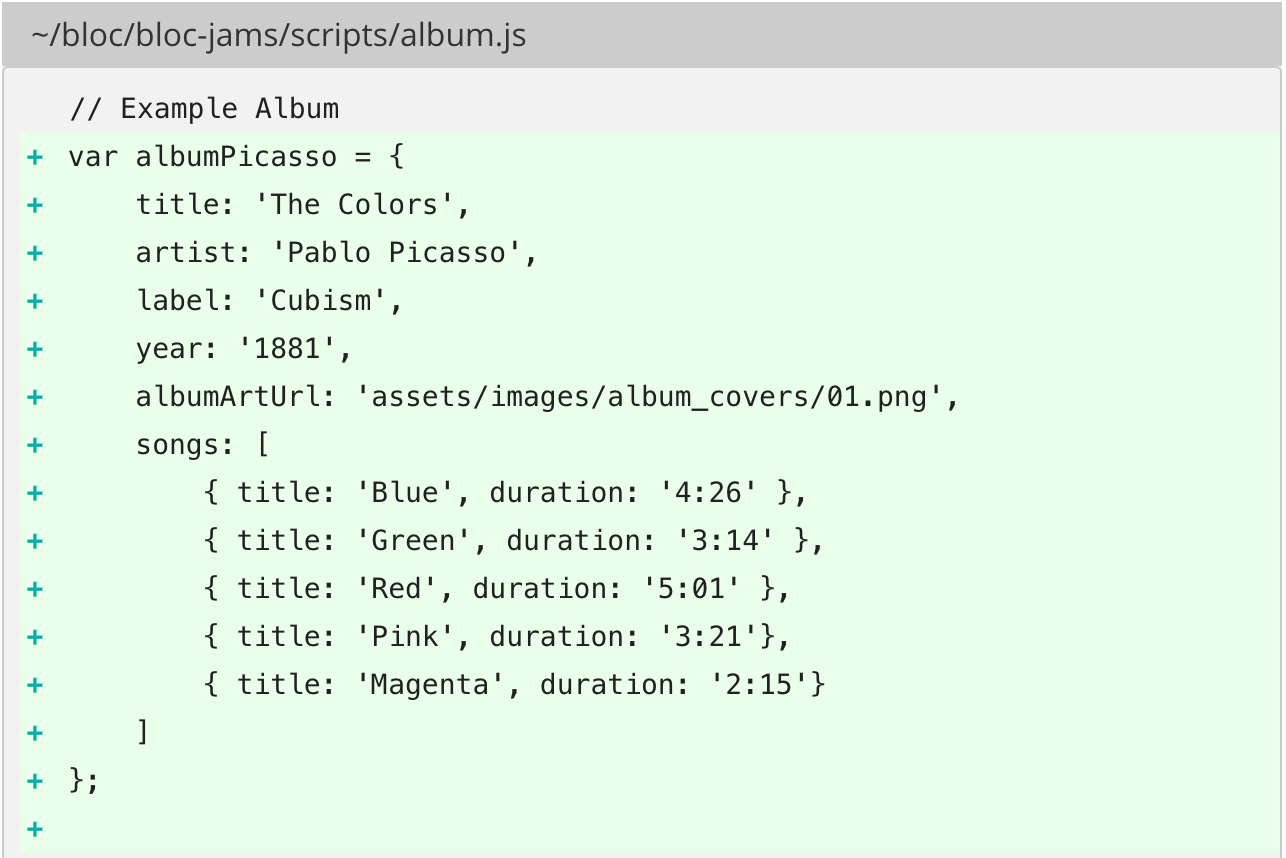
Also instead of hard-coding the data from the album into the table, this could be stored by using objects such as the sample one below:
Now with the album data set up, it was time to set up the play/pause functions. Since there would be quite a bit of functionality on this page, it required an understanding of event delegation to reduce the number of event listeners. While having event listeners for everything may seem like a good idea, it can make the page load and execute JavaScript more slowly which hurts the user experience. With event bubbling, we are able to listen for an event on a parent such as when an event may fire such as a click on a child element. We can make it propogate up the DOM tree to its parent.
By implementing this, I made the play button display instead of the song number whenever the user hovers over the table row. There was a separate event listener for when the user leaves the row with a method that would revert the play button back to the song number when the user’s mouse leaves.
Later on a click event listener was created for when the user clicks the play or pause button when hovering over a song. In response to the click, a clickHandler() function was created that would cause a play button to become a pause button if clicked and vice versa.
After the app was built with the plain JavaScript, the second iteration of the project was to build it using jQuery which amounted to a lot of refactoring the original code to use jQuery conventions such as selectors and jQuery methods such as .empty(), .append(), and .text(). See an example of this below:
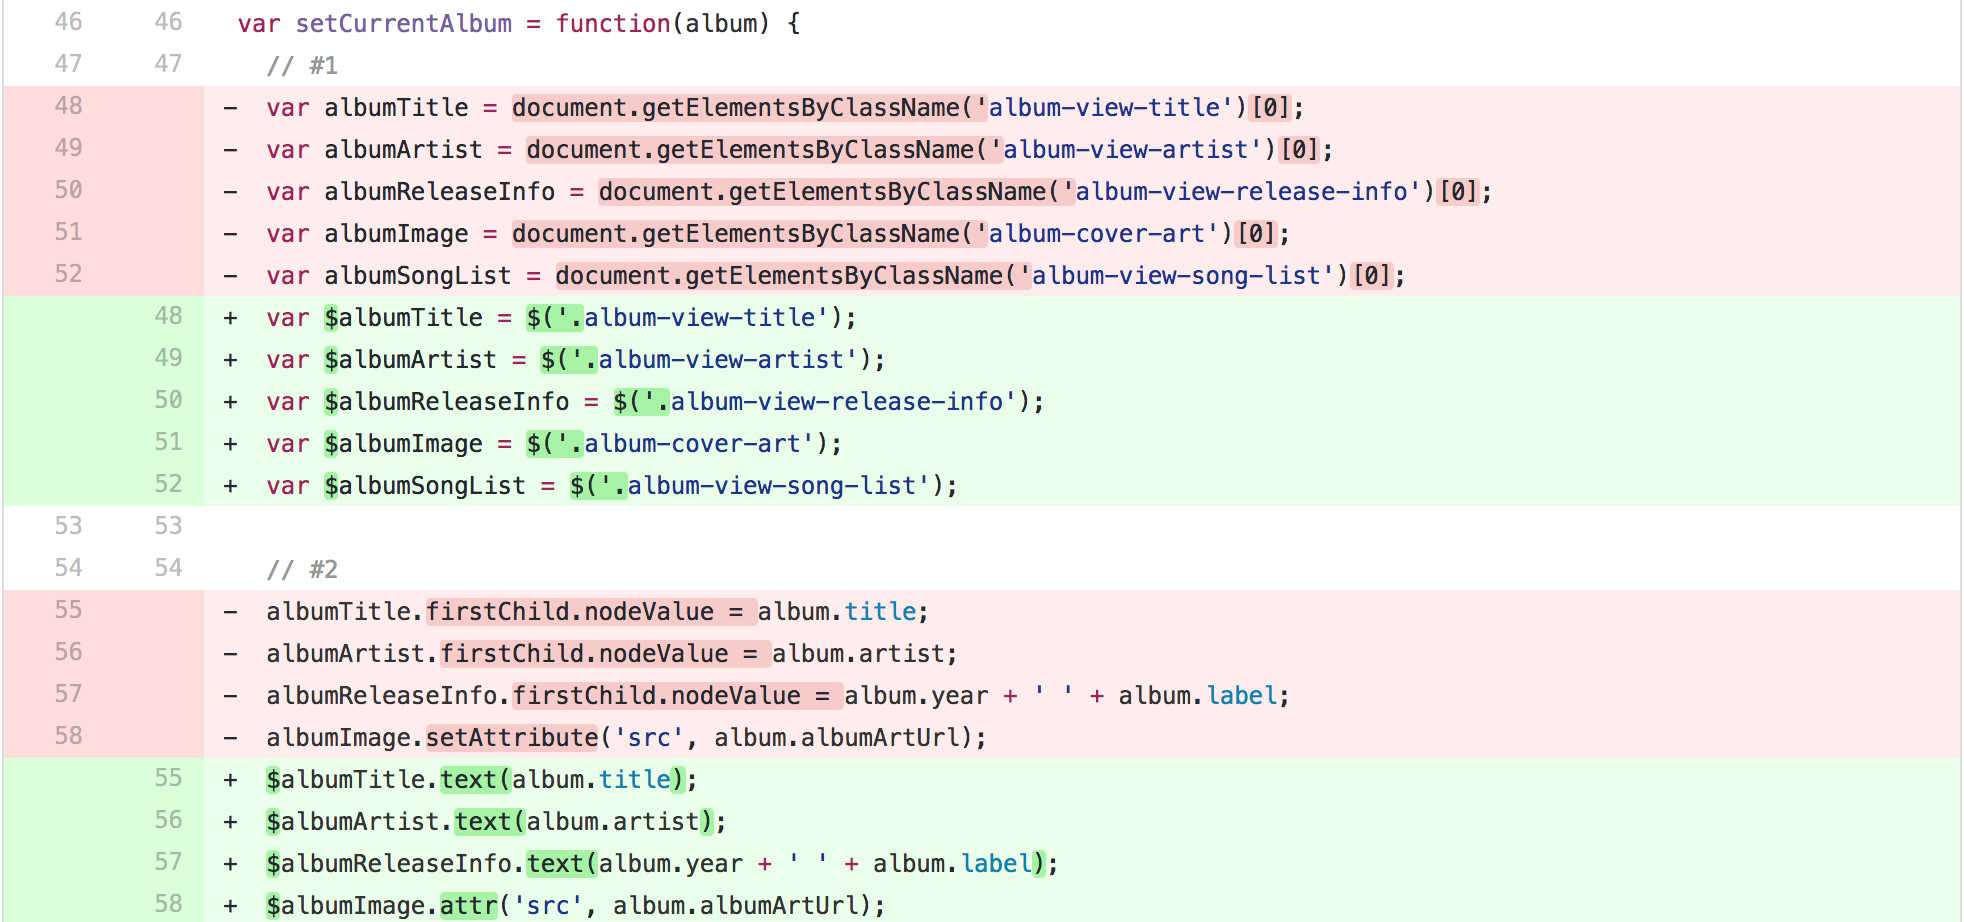
Here I replaced each instance of getElementsByClassName with a jQuery selector and used jQuery’s CSS-style syntax to select the elements. Each of these includes a $ to the start of each variabl ename because they now reference jQuery objects. jQuery’s text() method is used to replace the content of each text node rather than setting firstChild.nodeValue. The setAttribute() method is replaced by jQuery’s attr() method. It is important to note that jQuery and JavaScript work harmoniously. Even though I refactored a good amount of JavaScript, anything that still used basic DOM scripting would still function.
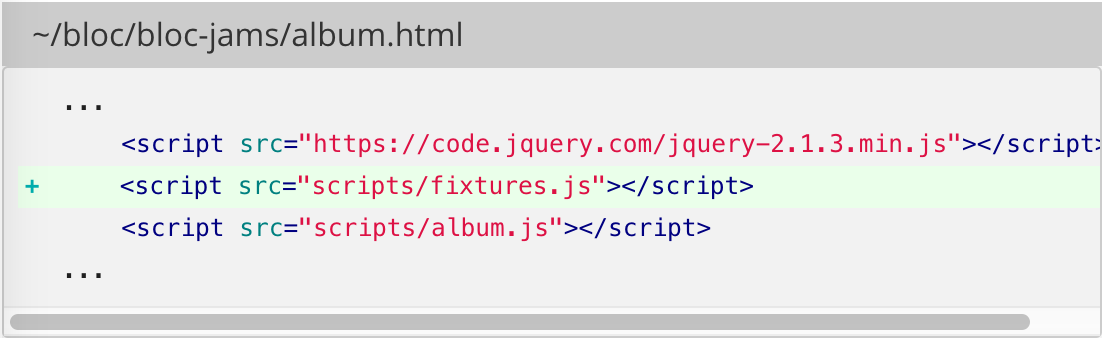
Another major refactor was the removal of the fake album data in album.js and moving it to a fixture which is an object that provides quick and easy ways of loading the application with “fake” data. The album data was cut and pasted into a fixtures.js file and included in a script tag at the bottom of album.html.
When jQuery was added to the project, the player bar was also implemented which contained seek bars for the song playback and volume. It also features a play button and a previous and next button. Song playback was the most complex part of the project as it required functions that could track the index of the current song so other functions could know which song was being currently played. Separate functions for next song and previous song were implemented which required incrementing and decrementing the index of the current song respectively.
After all the functions had been put in place, the Buzz music library was added for the actual playing of audio files by using the Buzz API which contained helpful functions such as .play(), .pause(), .stop(), and isPaused().
Results
In order to test if the app was working property, a local server was set up using npm start in the console, and I constantly refreshed the app in the browser to make sure that what I added was working properly. Before using DOM scripting in JavaScript or selectors in jQuery, or using controllers, services, and views in AngularJS, I manually filled in data in the HTML to make sure that the layout looked right.
When I tested out the app the first thing I wanted to do was to play a song using the play button on the player. The strange part was that it didn’t play anything. I expected that it would just play the first song, but it didn’t.
When the issue above was discovered by one of my testers, I realized that the reason the play button on the player bar wouldn’t work at the start if nothing was already playing was because there was no default setting for the current song if nothing was playing. The currentSoundFile would have been null.

In the code here, I created a conditional that checked to see if currentSoundFile == null. If it was, it would set the song to the first song as well as set the currentlyPlayingSongNumber to 1 as well.
Conclusion
From producing the app with plain JavaScript first then jQuery, I was able to get a strong sense of how they could each achieve the same purpose but sometimes in much different ways. When going from JavaScript to jQuery, it felt much like refactoring where many lines of code could be simplified into just a few lines in jQuery. Despite these, JavaScript is the foundation, and without building the application through plain JavaScript first, I would not have as good of an understanding of the DOM and how code is interpreted. I hope to be able to add more functionality to this app in the future such as the ability for users to add their own music and to personalize it for themselves.